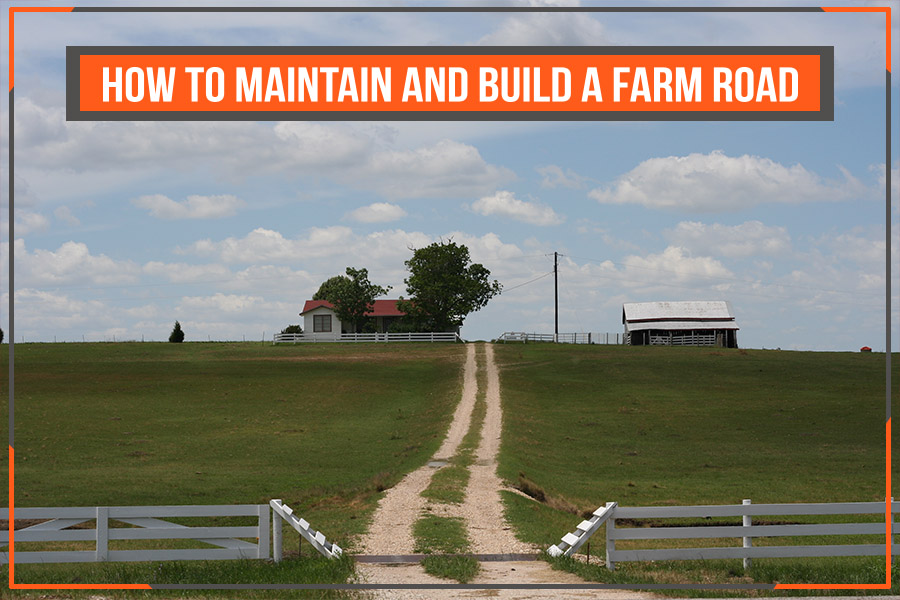
A ranch or farm road has to handle everything from a pickup to a loaded cattle trailer, in dry heat and in a spring downpour. Most road problems come down to three things: a weak base, poor drainage, or the wrong surface for the traffic. This guide covers how to lay out and build a road that lasts, how to move water away from it, how gravel, tar and chip, and asphalt compare, and how to maintain the road once it’s in.
Plan the route first
Where a road goes matters as much as how it’s built. A few hours spent walking the route can save years of washouts and soft spots.
- Stay on high ground where you can. Ridges and gentle slopes drain naturally. Low spots and creek bottoms hold water and turn soft.
- Follow the land, not a straight line. A road that runs along the contour is easier to drain than one that goes straight up and down a hill, where water runs down the road itself.
- Keep grades gentle. Steep sections are hard on trucks and trailers and erode quickly. Where a steep stretch can’t be avoided, plan extra drainage.
- Size it for your biggest equipment. Measure your widest tractor, implement or trailer, and add room on each side. Long trailers also need wide curves and a place to turn around.
- Add pull-offs on long single-lane roads. They let two vehicles pass and give delivery trucks room to wait.
- Think about who uses it. Feed and fuel deliveries, hay trucks, livestock haulers, emergency vehicles and visitors all need to get in and out.
Build a strong base
The base carries the load. A surface on top of a weak base will rut, pothole and break up no matter what material you choose.
Strip and prepare the subgrade
Remove topsoil, roots and other organic material, which compress and rot over time. Then shape and compact the native soil underneath. Soft spots should be dug out and replaced with better material.
Know your soil
Texas soils vary a lot. The Blackland Prairie clay around Waco, Temple and the DFW area swells when wet and shrinks when dry, which can heave and crack a road. On heavy clay, a thicker base and sometimes a geotextile fabric between the soil and the rock help spread the load and keep the base from mixing into the mud. West of the Balcones Escarpment, limestone is closer to the surface, and in West Texas, caliche is common and can make a workable base material when it’s properly placed and compacted.
Add base rock in compacted layers
Crushed stone with a mix of sizes locks together better than rounded gravel. Place it in layers and compact each one before adding the next. Roads that carry loaded trucks need a deeper base than a driveway that only sees cars.
Shape a crown so water runs off
A crown is the slight high point down the center of the road, so rain runs off to both sides instead of sitting on top. Without a crown, water soaks into the base and potholes follow. Gravel roads need more crown than paved roads, commonly around half an inch of fall per foot of width from the center to the edge. Paved roads need less, often around a quarter inch per foot. Too much crown makes a road uncomfortable to drive and can cause edge erosion, so aim for a steady, moderate slope.
On curves and hillside roads, a road may slope to one side instead of having a center crown. Either way, the goal is the same: get water off the surface quickly.
Ditches: carry the water away
Once water runs off the road, it needs somewhere to go. Ditches along the sides collect it and carry it away.
- Keep the ditch bottom lower than the base, so the base stays dry.
- Use gentle side slopes that resist erosion and are easier to mow.
- Turn water out often. Lead-off ditches (sometimes called turnouts or wing ditches) let water leave the main ditch at intervals, so it doesn’t build up speed and volume and wash out the road.
- Let grass grow in the ditch. Vegetation slows water and holds soil in place.
- Check ditches after big storms. Clear debris, sediment and anything that blocks flow.
Swales: a gentler way to move water
A swale is a shallow, wide channel with grass or other vegetation. On many farms and ranches, swales work well alongside or instead of deep ditches. There are good reasons to consider them:
- They slow water down. A broad, grassy channel reduces the speed of runoff, which cuts erosion.
- They let water soak in. Some of the runoff sinks into the ground instead of rushing off the property.
- They trap sediment. Grass catches soil and debris before they reach ponds, creeks or culverts.
- They’re easy to cross and maintain. Shallow sides let equipment cross and mowers pass, unlike deep, steep ditches.
- They cost less to build and keep up than many structural drainage options.
Swales need a steady, gentle slope and healthy vegetation. Bare swales erode just like ditches.
Culverts: get water under the road
Where the road crosses a natural drainage path, a draw or a ditch, a culvert lets water pass underneath instead of flowing over the top.
- Size it for the water, not the budget. An undersized culvert backs water up and can wash the road out in a big storm. Look at how much land drains toward that spot.
- Set it at the natural flow line with a slight downhill slope so it doesn’t fill with sediment.
- Cover it adequately. The pipe needs enough compacted fill on top to handle heavy loads without crushing.
- Protect the ends. Rock or headwalls at the inlet and outlet keep water from eroding around the pipe.
- Keep it clear. Check culverts after storms and remove debris and sediment.
Where your road or driveway meets a public road, check with your city or county; many require a permit for driveway approaches and culverts.
Ranch driveway and entrance details
The entrance is where your road meets public traffic, so it deserves extra thought:
- Set the gate back far enough that a truck and trailer can pull completely off the public road while someone opens it.
- Make the entrance wide, with curves generous enough for long trailers to swing in without dropping wheels into the ditch.
- Keep clear sight lines in both directions, trimming brush where needed.
- Call 811 before any digging or grading so buried lines get marked. Rural properties often have water lines, power and pipelines that aren’t obvious from the surface.
- Plan cattle guards, gates and fencing as part of the road, with drainage around them.
- Consider paving the first stretch. It keeps gravel off the public road and handles the turning and braking traffic that tears up the entrance first.
Choosing a surface: gravel, tar and chip, or asphalt
All three can work well on a well-built base. The right choice depends on traffic, budget, dust and how much upkeep you want to do.
| Gravel | Tar and chip | Asphalt | |
|---|---|---|---|
| Upfront cost | Lowest | Moderate, usually a fraction of asphalt | Highest |
| Typical life of surface | Needs regular regrading and new rock | Roughly 7 to 10 years before resealing | Many years with crack sealing and sealcoating |
| Maintenance | Frequent: grading, adding rock, dust control | Low: periodic reseal and patching | Low to moderate: crack seal and sealcoat |
| Dust | Dusty in dry weather | Little dust | Little dust |
| Ride and look | Loose, can washboard | Textured, rustic, good traction | Smooth, finished |
| Best fit | Low-traffic roads, pastures, tight budgets | Long ranch roads and driveways that need a paved surface at lower cost | Entrances, shop yards, homesteads, heavy daily traffic |
Many properties mix them: asphalt or tar and chip near the house, barns and entrance, and gravel on pasture roads. Tar and chip is our specialty and is often a strong fit for long rural roads. See tar and chip paving and asphalt paving.
Building a gravel road the right way
If you’re going with gravel, or starting with gravel and paving later, build it in layers:
- Clear and strip the route, then shape and compact the subgrade with a crown and ditches.
- Add fabric on soft or clay soils where needed.
- Place a layer of larger crushed stone for the base and compact it.
- Add a middle layer of smaller crushed stone and compact it.
- Finish with a surface layer that includes fines (small particles) so it packs into a firm, smooth top. Shape the crown again and compact.
Avoid rounded river gravel on the surface. It rolls under tires and never locks together.
Crushed limestone is the common choice across Central Texas because its angular pieces and fines pack down hard. Out west, caliche is widely used as a base and road material and works well when it’s kept dry and graded. Whatever you use, ask for a graded material with a mix of sizes rather than one uniform size, which won’t compact into a firm surface.
Why paving helps farm and ranch operations
Paving with tar and chip or asphalt isn’t just about looks. On a working property it can:
- Cut dust around homes, barns, livestock pens and equipment
- Give trucks and deliveries reliable access in wet weather
- Reduce wear on vehicles, tires and equipment
- Reduce the time and money spent regrading and replacing rock
- Make the property easier to use and more appealing to buyers
Learn more on our farms and ranches page.
Maintenance checklist
Every road needs some care. Small fixes now prevent big repairs later.
After heavy rain
- Look for standing water, washouts and soft spots
- Clear ditches, swales and culverts
- Note where water crosses the road so you can fix the drainage
Gravel roads
- Regrade to restore the crown and remove potholes and washboarding, ideally when the surface is slightly damp
- Add rock where the surface has thinned
- Keep the edges from building a berm that traps water on the road
Tar and chip and asphalt roads
- Patch potholes and broken edges promptly
- Seal cracks in mild weather before water gets in
- Reseal chip seal roads on a roughly 7 to 10 year cycle
- Sealcoat asphalt every 2 to 3 years
Year-round
- Trim trees and brush that shade the road or crowd the edges
- Keep heavy equipment off the shoulders and edges
- Don’t let livestock trample ditch banks
If you’d rather not do it yourself, we offer road maintenance.
Frequently asked questions
How wide should a ranch road be?
Wide enough for your widest equipment or trailer, with room to spare on each side. Add pull-offs on long single-lane roads and wider curves for long trailers.
Can you chip seal over an existing gravel road?
Often, yes, if the gravel base is solid, well compacted and drains properly. Weak or soft areas should be repaired first, and the crown and ditches checked.
How long does tar and chip last?
Roughly 7 to 10 years before it needs a reseal, depending on traffic, drainage and how well the base was built.
Do I need a permit for a culvert?
Check with your city or county; many require a permit for driveway approaches and culverts, especially where they connect to a public road.
Why does my gravel road keep washboarding?
Washboarding usually comes from traffic speed, loose surface rock without enough fines, and dry conditions. Regrading, adding the right surface material and slowing traffic all help. Paving ends the problem.
Get a free estimate. Whether you’re building a new ranch road or fixing an old one, contact us and we’ll take a look at your property.