A new driveway, parking lot or ranch road is a big investment, and most of what decides whether it lasts happens before the first load of asphalt shows up. This guide covers the whole process: choosing a surface, understanding cost, getting the base and drainage right, permits, timing, what happens on paving day, and how to care for new pavement while it cures.
Step 1: Define what the pavement needs to do
Start with how the surface will be used, not with the material. A few questions shape every other decision:
- What will drive on it? Family cars, delivery trucks, RVs, trailers, cattle trucks and farm equipment all put very different loads on pavement.
- How much traffic? A home driveway, a busy retail lot and a half-mile ranch road each call for a different build.
- How long and how wide? Size is one of the biggest cost drivers. Width affects passing room and turning space.
- What look do you want? Smooth black asphalt, a rustic stone finish, or clean concrete.
- What’s your budget and timeline? Knowing both up front helps a contractor recommend the right option instead of a generic one.
Step 2: Choose the right surface
Each paving material has a place. Here’s how the common options compare for property owners in Texas.
| Surface | Best for | Relative cost | Typical life with maintenance | Trade-offs |
|---|---|---|---|---|
| Tar and chip (chip seal) | Long rural drives, ranch roads, country properties | Usually a fraction of asphalt per foot | Roughly 7 to 10 years | Textured surface, some loose stone at first, not ideal for shoveling or skateboards |
| Asphalt | Driveways, parking lots, commercial and subdivision roads | Moderate | Often 15 to 20 years or more | Needs sealcoating every 2 to 3 years, softens in extreme heat |
| Concrete | Driveways, aprons, pads, curbs, areas with heavy point loads | Highest | Often 25 years or more | Higher up-front cost, longer cure time, cracks are harder to repair invisibly |
Tar and chip is our specialty, and it’s a great fit for long drives where full asphalt would be expensive. For smooth, low-maintenance residential surfaces, an asphalt driveway is the most common choice. Concrete makes sense where durability and a clean finish matter most.
Step 3: Understand what drives the cost
Every project is priced differently, but the same factors show up in every estimate:
- Size. Square footage, or length and width for drives and roads.
- Material. Chip seal, asphalt and concrete differ a lot per foot.
- Thickness. Heavier traffic needs a thicker surface and base.
- Site prep. Removing old pavement, clearing, grading and hauling away material all add cost.
- Base work. Building or repairing the crushed stone base is often the biggest variable, especially on clay soil.
- Drainage. Culverts, ditches and regrading to move water away from the pavement.
- Access and logistics. Tight spaces, long haul distances and remote sites take more time and equipment.
- Extras. Edging, aprons, striping, and permits.
Ways to get more for your budget
- Pick the surface that matches your use. A long country drive rarely needs full asphalt.
- Don’t cut corners on the base. Saving on base work is the most common way a budget project turns into an expensive repair.
- Combine work. Paving, drainage and an apron done at once costs less than separate trips.
- Plan for maintenance. Regular sealcoating and crack sealing stretch the life of what you paid for.
- Schedule ahead. Booking before the busy season gives you more flexibility on dates.
Step 4: Get the base and drainage right
Pavement is only as strong as what’s under it. The surface you see is a wearing layer. The compacted base of crushed stone carries the load, and the native soil under that has to stay stable.
In Central Texas, that soil is often Blackland Prairie clay, which swells when wet and shrinks and cracks when dry. West of the Balcones Escarpment, you’re more likely to find limestone, and in West Texas, caliche. Each behaves differently, and a good contractor builds the base to suit what’s there.
A solid base and drainage plan includes:
- Removing topsoil, roots and organic material that will rot or settle
- Compacting the subgrade before any base goes down
- Placing crushed stone base at the right depth for your traffic and compacting it in layers
- Sloping the surface so water runs off, not toward buildings or into low spots
- Adding culverts, ditches or swales where water crosses or collects
Drainage is where many paving projects go wrong. Water that sits on or beside pavement soaks into the base and is one of the most common causes of early failure. Spring storms and flash flooding in Texas make this especially important.
Step 5: Check permits and property lines
Permit rules vary by location, so check with your city or county before work starts. Many require a permit for driveway approaches (where your drive meets the public road) and for culverts in road ditches. HOAs may have their own rules about materials, colors and placement.
Before work begins, it’s also worth:
- Confirming your property lines and any easements
- Calling 811 so underground utilities are marked before any digging
- Getting HOA approval in writing if it’s required
Step 6: Choose a contractor and compare estimates
A low bid isn’t a good deal if it skips base work. When comparing estimates, make sure each one covers the same scope.
- Get the estimate in writing with the scope of work spelled out
- Ask what base depth and surface thickness are included
- Ask how drainage will be handled
- Check whether removal of old pavement and cleanup are included
- Read recent reviews and look at photos of past projects
- Be wary of door-to-door crews offering leftover asphalt at a discount
Step 7: Plan around the weather
Asphalt needs warmth to be placed and compacted properly. In Texas, spring and fall are usually ideal. Summer paving works well, often with early starts to avoid the worst of the afternoon heat. Winter jobs can go ahead on mild, dry days but are more weather-dependent, and hard freezes do happen.
Rain matters most. Asphalt shouldn’t be placed on a wet base, and chip seal and sealcoat need dry conditions to bond. Expect your contractor to reschedule if rain is in the forecast. That’s a sign they’re doing it right.
Step 8: Prepare for paving day
A little preparation keeps things moving and protects your property:
- Move vehicles, trailers and equipment off the work area and out of the way
- Plan where you’ll park for the next few days
- Turn off sprinklers that could spray the work area
- Keep kids and pets inside or well away from equipment
- Let neighbors or tenants know about noise and access
- For businesses and HOAs, plan for phased closures and signage
What happens on paving day
- Final prep. The base is checked, graded and compacted.
- Tack or prime coat. A thin binder helps the new layer bond, especially for overlays.
- Placement. Hot asphalt is spread to the right thickness. For chip seal, hot liquid asphalt is sprayed and stone chips are spread over it right away.
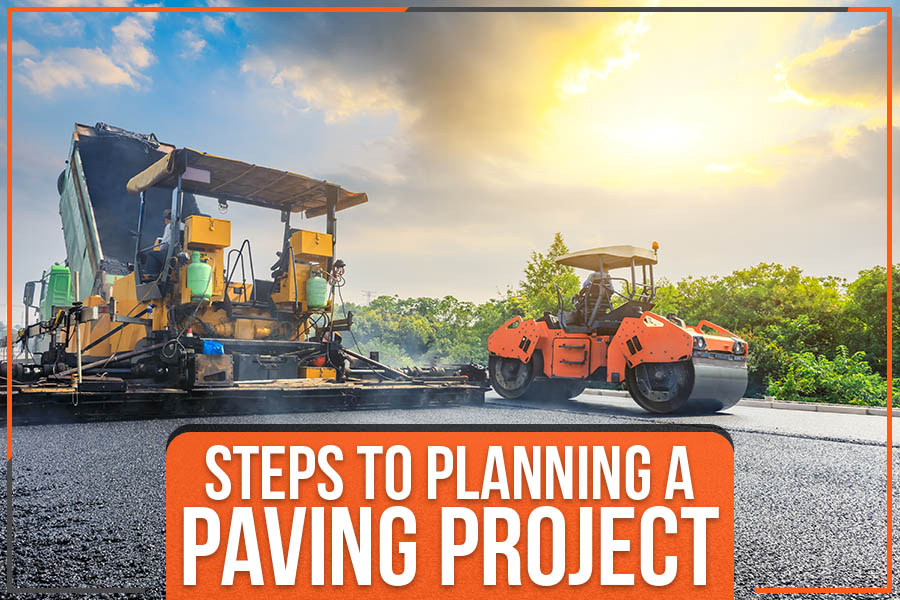
- Compaction. Rollers compact the surface while it’s still hot, which is what gives it strength.
- Edges and cleanup. Edges are finished, transitions are checked, and the site is cleaned up.
Step 9: Let it cure
New pavement needs time before it can handle full use:
- Asphalt: Stay off it for at least 24 hours, and give it up to 72 hours before driving, longer in hot weather. It keeps hardening for months, so avoid sharp turns while stationary, heavy loads, and parking in the same spot for the first few weeks.
- Tar and chip: Usually drivable soon after it’s rolled, but drive slowly and avoid sharp turns for the first couple of weeks while the chips set. Some loose stone is normal early on.
- Concrete: Foot traffic after about a day, and cars after roughly 7 days. Heavy vehicles should wait longer.
Don’t sealcoat new asphalt right away. Wait about six months so it can fully cure, then start a sealcoating schedule every two to three years.
Common mistakes to avoid
- Skimping on base depth or compaction to save money
- Ignoring drainage, or paving into a low spot
- Choosing a surface that doesn’t match the traffic
- Paving in rain or on a wet base
- Skipping permits for approaches or culverts
- Driving on new pavement too soon
- Skipping maintenance once the job is done
A typical project timeline
- Planning. Decide on use, surface and budget. Request estimates.
- Site visit and estimate. The contractor measures, checks soil and drainage, and gives you a written scope.
- Permits and approvals. Check with your city, county or HOA. Timing varies.
- Scheduling. Pick a date with good weather, leaving room for rain delays.
- Site prep (1 or more days). Removal, grading, drainage and base work.
- Paving (often a day for a driveway). Placement and compaction. Larger lots and roads take longer.
- Curing (1 to 3 days for asphalt, about a week for concrete). Keep traffic off.
- Ongoing care. Sealcoat asphalt after about six months, then every two to three years, and seal cracks as they appear.
Frequently asked questions
How long does it take to pave a driveway?
The paving itself is often done in a day for a typical residential driveway. Site prep and base work can add a day or more, and you’ll need to stay off new asphalt for 24 to 72 hours afterward.
Is tar and chip cheaper than asphalt?
Usually, yes. Chip seal typically costs a fraction of asphalt per foot, which is why it’s popular for long rural drives and ranch roads. It has a rougher texture and a shorter life, roughly 7 to 10 years.
Do I need a permit to pave my driveway?
It depends on where you live. Check with your city or county. Many require a permit for driveway approaches and culverts, and HOAs may have their own approval process.
What’s the best time of year to pave in Texas?
Spring and fall are generally ideal, with summer also workable. The key is warm, dry conditions. Winter paving is possible on mild days but more likely to be delayed by weather.
Can you pave over my old driveway?
Sometimes. If the old surface is sound and the base is stable, an overlay can work. If the base has failed, it needs to be removed and rebuilt, or the new layer will crack the same way. Our asphalt paving team can tell you which applies.
When can I sealcoat my new asphalt?
Wait about six months so the asphalt can cure fully. After that, sealcoating every two to three years helps protect it from sun, water and fluids.
Get a free estimate. When you’re ready to start planning, request a free estimate and we’ll walk your property and help you choose the right surface for the job.